Table of Contents
Introduction
Adroit Custom lets you create customized user interfaces for Voltage Modular patches.
The bundle consists of three modules:
The idea is that you build a Voltage Modular patch as usual using any modules you like, while alongside you use multiple Custom Panel modules to construct a user interface containing interactive elements such as knobs, sliders, buttons and joysticks that are mapped to remotely control things deep within the patch.
You can also add elements like LEDs, oscilloscopes and meters to your custom interface in order to provide visual feedback.

All of the complexity and mess of the patch can be hidden off-screen leaving you with a user-friendly, aesthetically pleasing interface containing only those elements that are important.
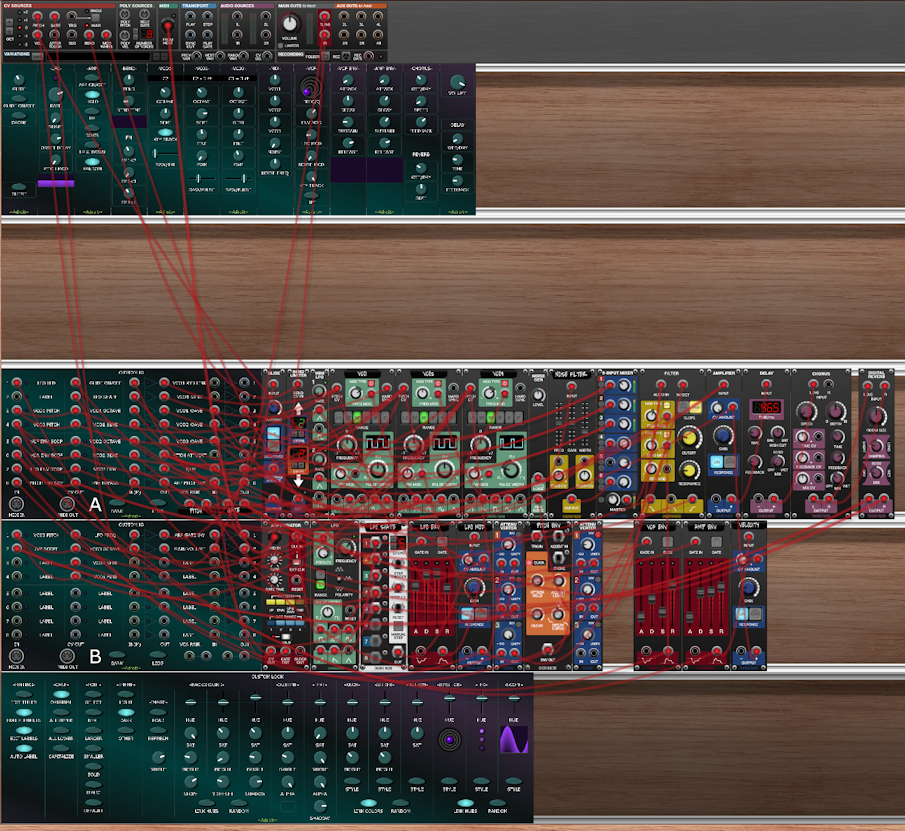
The Custom Look module lets you tailor the look of your interface. You can either import your own background graphics or use a built-in gradient shading system, then choose from a range of skins for the controls and use any font that’s installed on your computer for text labelling.
CV, audio and MIDI connectivity are key to Adroit Custom yet Custom Panel modules do not themselves contain any sockets. Instead all wired connections are handled by Custom IO modules. Up to four of these may be deployed at once in order to provide up to 32 CV/audio inputs, 32 CV outputs, 64 voltage controlled amplifiers, 4 MIDI outputs and 1 MIDI input.
The VCAs are arranged in pairs that can be configured to operate as switches, attenuators, attenuverters, crossfaders or panners. They can be used to control signal routing, modulation and mixing in your patch.
So with the help of Custom IO modules, Custom Panel knobs, sliders, buttons and joysticks can output CV, output MIDI and control VCA pairs as well as remotely control controls on other Voltage Modular modules. Custom Panel controls can themselves also be controlled by CV and MIDI.
You can use CV and/or MIDI to control plugins running in Voltage Modular’s Plugin Host module and with suitable interfacing hardware you can remotely control external kit such as MIDI keyboards and Eurorack – so it’s possible to integrate all of the elements of a studio or live setup into a single homogeneous user interface.
Adroit Custom projects are normal patches so are stored in standard Voltage Modular preset files. You can therefore share your work by transferring a single file.
Although to add something special to your interface you may wish to use one of the many TrueType and OpenType fonts that are available for free download (but aren’t shipped with your operating system) and these non-standard fonts are NOT embedded in the preset file. So to get the exact same look on another computer such fonts need to be installed separately – although this isn’t much of a problem as it’s very easy to download and install a font. If you Google “installing a font” and “free fonts” you’ll find plenty of helpful resources. If a preset uses a font that isn’t installed on your computer then Adroit Custom will gracefully fall back to using the default font instead.
Custom Panel
The fundamental building block of Adroit Custom is an innocent looking module called Custom Panel. This is a small (6 HP) panel strip that contains a customizable column of user interface elements. You add and configure these elements using a set of context-dependent pop-up menus.
A right-click on a newly added Custom Panel module shows the Main Menu…
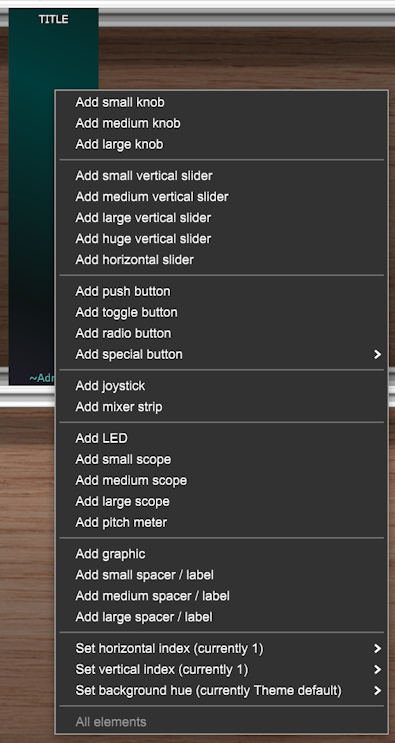
If you select the Add small knob option at the top of this menu then a small knob will appear on the module.

The exact appearance will vary depending on how you have configured things using the Custom Look module. Here we are using the default font and dark theme settings.
If you right-click on the knob you’ll get another menu as shown below.

If you select the Map to control option at the top of this menu then any control in your patch that could be controlled by the knob will be highlighted in green. This is illustrated below with a stock Filter module.
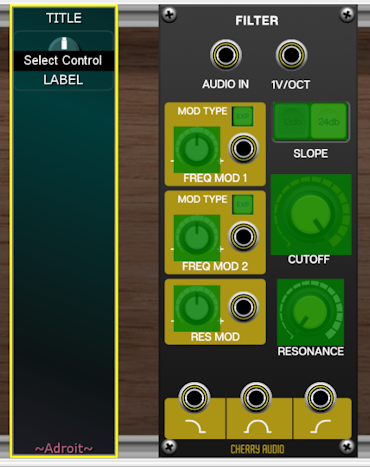
Let’s say you want the knob to control the filter’s cutoff, so you click on the CUTOFF knob….
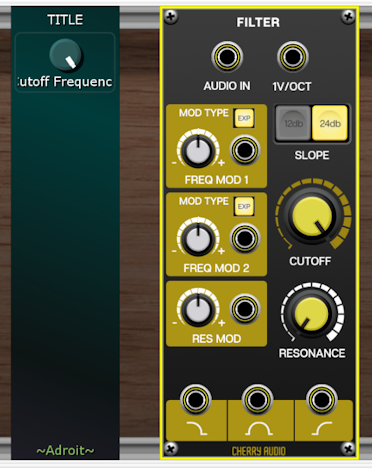
Now the knob on the Custom Panel module controls the cutoff knob on the filter.
You’ll notice that the label beneath the Custom Panel knob has changed. This is because by default the AUTO LABEL button on the Custom Look module is engaged so the name that Cherry Audio used inside their module for the CUTOFF knob is used to automatically label the knob. In this case Cherry Audio chose “Cutoff Frequency”. Unfortunately this is too long to fit in the space available using the default font so it’s cropped. To fix this, double-click on the label and type in something more appropriate such as CUTOFF.
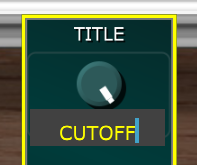
When you press return the editing field closes and we have a regular label…
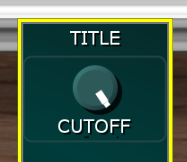
The bulk of your interaction with Adroit Custom will consist of navigating these two menus – one menu for adding new elements and the other for modifying existing elements. Although the menu hierarchy is quite large, it adapts to circumstances so you are only ever presented with viable choices and after an initial steep learning curve you will soon be building interfaces at pace.
To be honest you will probably find it a painfully slow process for the first hour or so! But your efficiency will quickly improve as you become more familiar with the basic techniques and the layout of the menus. You’ll also learn various shortcuts that help make certain repetitive tasks easier.
You will of course not want to be limited to the single column of controls provided by a Custom Panel module, so in practice you will build larger interfaces by butting together any number of Custom Panel modules horizontally and/or vertically. A small interface might consist of just two or three Custom Panel modules in a single cabinet while a larger interface could be two cabinets high and consist of say 20 Custom Panel modules arranged in an 10 by 2 grid, as shown in the example below.
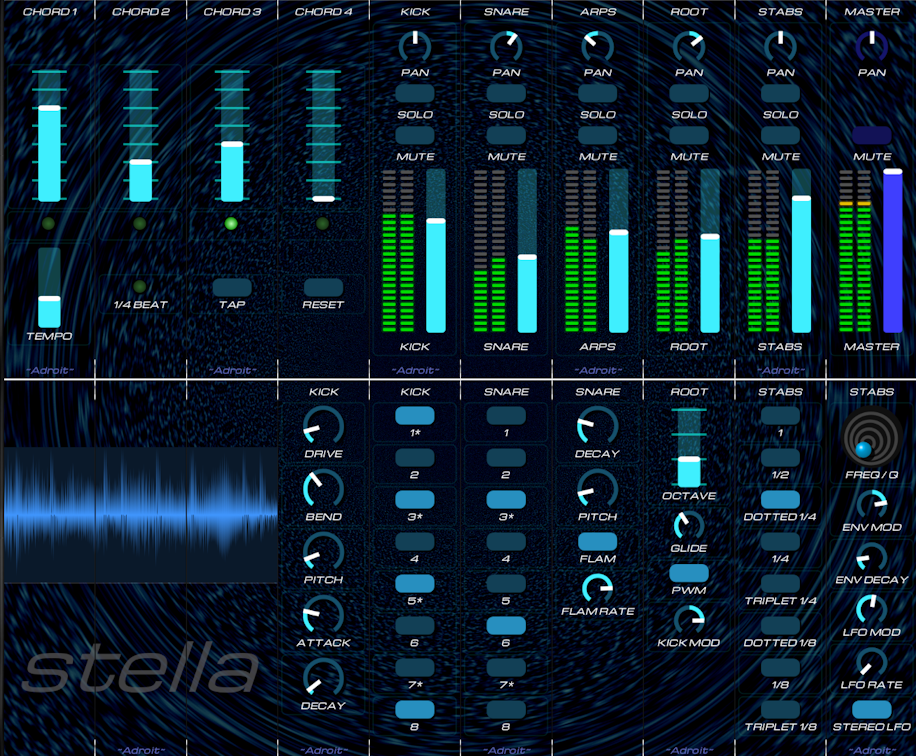
It’s completely up to you how many Custom Panel modules to use as there is no set configuration and you can add, remove and rearrange modules as you please.
The Custom Look and Custom IO modules connect invisibly to the Custom Panel modules so they can be kept hidden off-screen leaving your customized interface completely free-standing and uncluttered.
Click this link for extensive documentation on Custom Panel.
Custom Look
The ridiculously wide Custom Look module lets you control the appearance of your interface.

The background can be fully customized by loading your own image from a standard graphic file or you can use a flexible built-in gradient shading system instead. Smaller individual graphics can be loaded on top of the background to add things like logos. As we’ve already seen labels can be edited simply by double-clicking on them and typing in text.
Elements such as knobs and sliders come in a range of different sizes and can be set to virtually any color using a hue, saturation, brightness color model (often called HSV).
Custom Look settings are organized into three customizable themes – Light, Dark and Other. A special Theme button can be added to your interface that cycles through these when clicked.
Click this link for more information about Custom Look.
Custom IO
Custom Panel modules do not contain any jack sockets, instead they connect invisibly with Custom IO modules that look after any wired connections between Adroit Custom and other modules. Up to four Custom IO modules can be deployed at once. They are identified by a Bank letter – A, B, C or D.
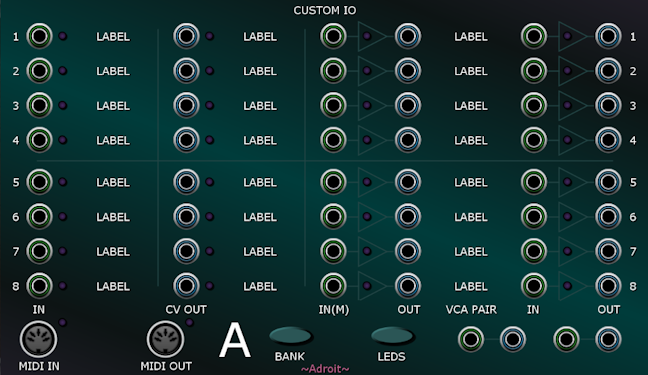
Each bank provides 8 inputs that can be used to drive Custom Panel visual elements such as LEDs and oscilloscopes. Control voltages fed to these inputs can also be assigned to control the settings of Custom Panel knobs, sliders and buttons. Custom Panel controls can also be controlled by MIDI messages received via the MIDI IN socket.
8 CV outputs provide control voltages mapped from Custom Panel controls that can be used anywhere in your patch. Similarly the MIDI OUT socket can transmit CC and other MIDI messages.
On the right of the module there are 16 voltage controlled amplifiers arranged as 8 pairs. These VCA pairs can be configured to act as switches, stereo attenuators, attenuvertors, crossfaders or panners that are linked to the settings of Custom Panel controls.
Simple setups may not require any Custom IO modules as no wiring is required to make Custom Panel elements remotely control the knobs, sliders and buttons in your patch.
Click this link for further documentation on Custom IO.
Custom Control
The Custom Control module is still in the late stages of development so isn’t available quite yet.
Please note that Custom Control is NOT INCLUDED in the Adroit Custom bundle, it will require an additional purchase.
Custom Control is mentioned here because it was developed in parallel with the other modules and it massively expands the capabilities of the Custom bundle.
Initially all four modules were going to be sold together but such a bundle would have been prohibitively expensive and the learning curve a little too steep. So it made sense to split the project in two. It’s recommended that you start with the Custom bundle and then add Custom Control when you want to go to the next level.
The most important thing that Custom Control adds is a powerful technique called Scene Morphing.
A scene consists of the settings of all of the controls in your custom interface. Critically, you can not only switch instantly between scenes (rather like using Variations in Voltage Modular), you can also smoothly and continuously morph between them. This Scene Morphing can be under manual, sequenced or voltage control.
It is possible to morph at high speed, so for instance an envelope generator can be used to sweep through a continuum containing multiple scenes in the span of a single note.
Scene Morphing is quite different to Vector Synthesis. Vector Synthesis merely changes the mix levels of various sound sources while Scene Morphing allows every single control in you patch to be in complex motion. To achieve this level of fluid control in a conventional setup you would need to have an independent multi-segment envelope generator or sequencer automation channel driving every parameter in your patch.
Here’s what the Custom Control module currently looks like though a few things may change before its release.
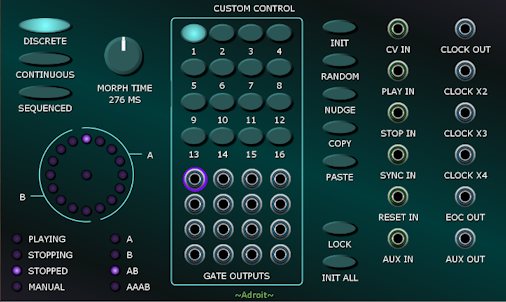
Much of Custom Control’s functionality is accessed from within Custom Panel rather than through the module shown above because when the Custom Control module is present in a patch many extra options appear in the Custom Panel menus.
Demo Patches
To see some of the ways that the Adroit Custom bundle can be used click this link to access a number of Voltage Modular preset files that you can download. These demo patches use Custom Panel, Custom Look and Custom IO along with various Cherry Audio modules that are included in their Core + Electro Drums bundle.