Begin by loading up the patch from Tutorial 5 (or perhaps recreate it from scratch as practice in rebuilding such simple patches pays off in terms of understanding what is going on, honing your ability to patch quickly and accurately and to debug when a cable is out of place).
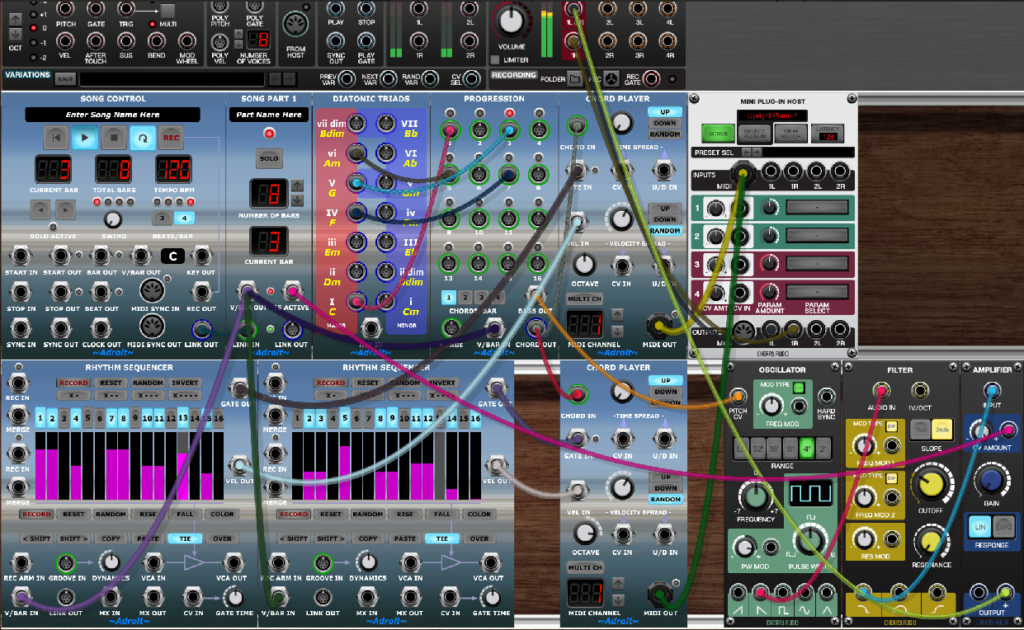
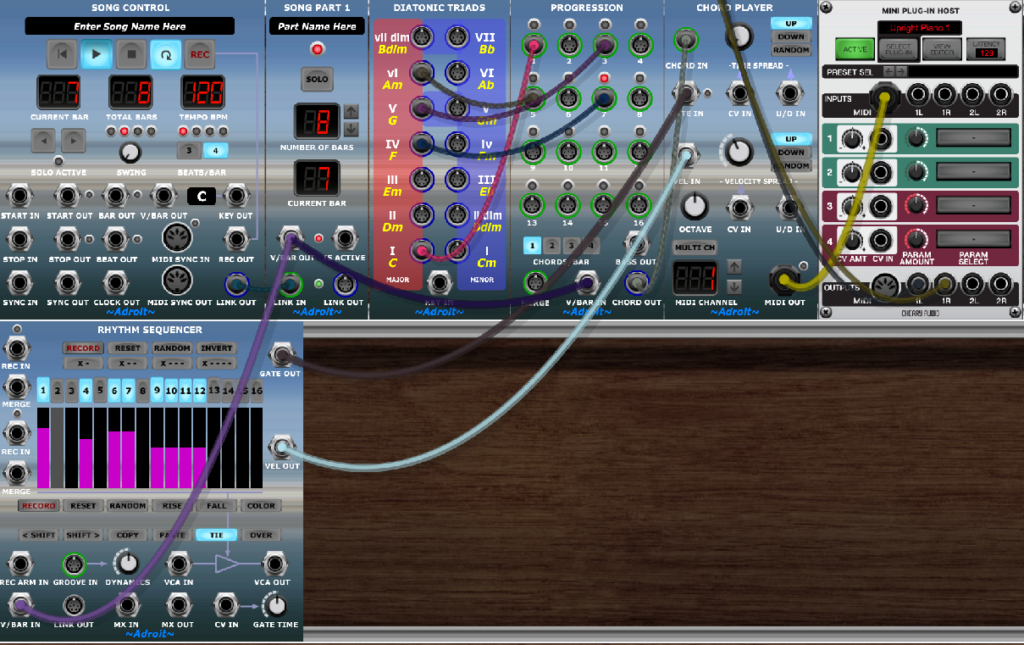
Our starting point is something like this…
The only source of chords in LSSP 101 is the Diatonic Triads module. The full version of LSSP includes Chord and Inversion and other modules that allow you to deploy the full range of chords. But Diatonic Triads is still very useful on its own.
Diatonic Triads are three note chords that use only notes from the scale. They form the core palette of almost all songs.
Because we are only dealing with three note chords in root position (that’s with the notes in their standard octave order) a useful technique for adding a bit of interest is to stack the chords. In other words to duplicate a chord over two or more octaves.
This is very easy to achieve by simply adding Chord Player modules in parallel.
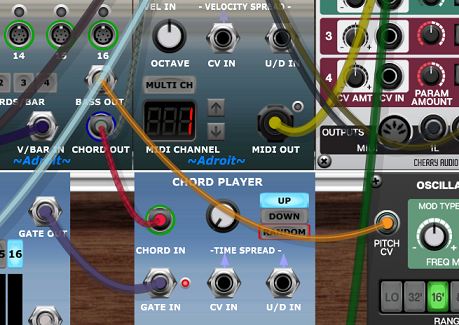
Let’s add another Chord Player directly beneath the first one to make it obvious that the wiring is the same.
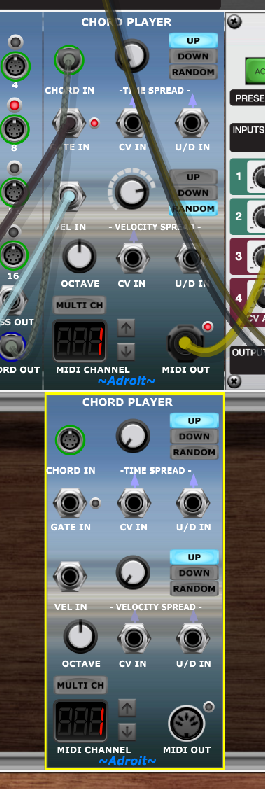
Patch CHORD OUT from the Progression module to the CHORD IN of the new Chord Player. Then patch the GATE OUT and VEL OUT from the Rhythm Sequencer to the GATE IN and VEL IN sockets of the Chord Player. Finally patch the Chord Player’s MIDI OUT to the MIDI INPUT of the Mini Plug-In Host module.
Note that this is exactly the same wiring as we used before. Voltage Modular handles merging the MIDI signals together automatically so there is no need to use a special module for this task like you would need in a hardware setup.
You won’t notice much change at first but now increase the new Chord Player’s OCTAVE knob so that it’s two octaves higher than the other Chord Player. Then turn up the new Chord Player’s VELOCITY SPREAD knob and click on the RANDOM button next to it.
You should now have six notes playing, each with subtle variations in velocity.

It’s rare that you see a pianist’s right hand do exactly the same as their left. So let’s give the new Chord Player a different rhythm pattern.
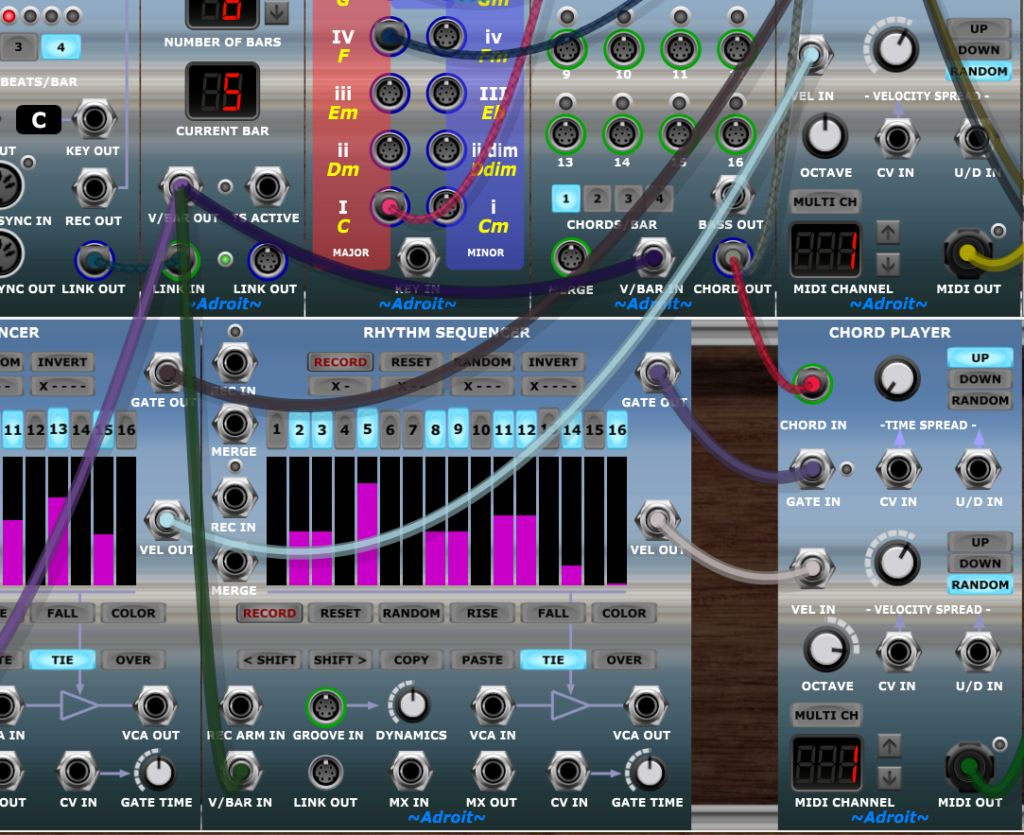
Add another Rhythm Sequencer to the right of the existing one and patch the Song Part module’s V/BAR OUT to its V/BAR IN socket to get the new Rhythm Sequencer to run in sync with the existing one.
Now move the lower Chord Player’s gate and velocity connections from the left hand Rhythm Sequencer to the one on the right – so that the lower Chord Player is now being controlled by the right-hand Rhythm Sequencer. Then program a pattern on the new Rhythm Sequencer – perhaps simply by clicking on its two RANDOM buttons a few times.
Engage the TIE button to enable sustained notes, unless you want adjacent steps to sound as 1/16th notes.
Now, even though we have exactly the same simple chord progression as we built in Tutorial 5 and the rhythm is just a single bar pattern repeated over and over, the end result ought to sound pretty cool. If not then play around with the Rhythm Sequencer patterns until you find something that works.
Finally, we’ll add one more element – a simple drone. You’ve probably already noticed that socket on the Progression module labelled BASS OUT. Well it does exactly what you might expect. It outputs a pitch CV that is the lowest note of the current chord.
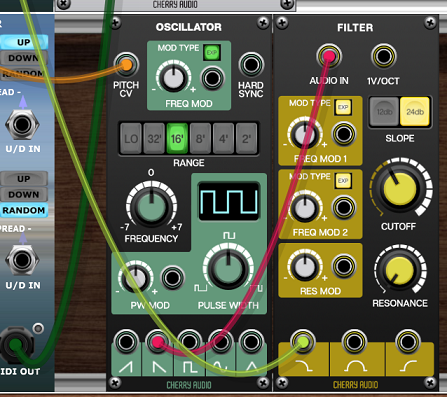
Add an Oscillator and a Filter module in the lower right of the window.
Patch the BASS OUT socket of the Progression module to the PITCH CV socket of the Oscillator.
Patch the Oscillator’s Sawtooth output to the Filter’s AUDIO IN and the Filter’s Lowpass output to the MAIN OUT 1L (M) socket at the top of the window so that the drone sound is added to the mix. As before turn down the Filter CUTOFF knob to make the drone sound both quieter and less harsh. You’d normally use a mixer but this works well enough in a demonstration patch.
You should now have a brassy sustained note playing the root of the chord along with the piano.
Just because the socket is called BASS OUT it doesn’t mean it’s just for bass. The bass refers to it being the bass note in the chord. So click on the 4′ button on the Oscillator to shift the drone into a higher octave. Twiddle with the Filter CUTOFF knob to adjust the balance.
There’s just one final detail before we finish. If you press STOP on Song Control the drone keeps playing. To fix this insert an Amplifier module between the Filter output and MAIN OUTS 1L (M)..
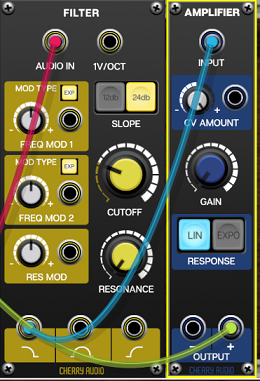
This will kill the drone sound until we activate the amplifier by patching the IS ACTIVE socket of the Song Part module to the CV AMOUNT socket of the amplifier.
Now when the Song Control Sequencer is stopped the drone is silenced. Use an envelope generator to get rid of the abrupt on/off if you like but the simple method shown will suffice in a demonstration patch.
Also note that you can use the Amplifier’s CV AMOUNT knob to adjust the drone’s volume now rather than having to rely on the filter CUTOFF to balance it against the piano.